Tuesday, June 26, 2012

Beach Refrigerator Magnets


It’s another very hot day in Oklahoma. How was your Tuesday?

In yesterday’s post I talked about going to Michaels and the new Mod Podge products I bought. Today, I will share with you the refrigerator magnets I made using some of the great products.

I used the podgeables, sparkle Mod Podge, dimensional magic Mod Podge and scrapbook paper with beach scenes.
I cut the scrapbook paper to fit the podgeables and then attached the scrapbook paper to the podgeables. I used the podgeables as the back of the magnet to make them more stable. I then added some sparkle to the sky of the beach scenes. 


Once that dried, I used the dimensional magic on top of the picture. Be sure to let the dimensional magic dry for at least three hours (this is where I became impatient). After everything was dry, I added magnets to the back.

Now, I have magnets with some great beach pictures.

Monday, June 25, 2012

Sea Shell Candle Holders


Hope you had a great weekend! Did you work on any new projects? Or did you take a trip? After hearing about all the great new Mod Podge products at Michaels, our family took a trip to a bigger nearby city to check it out for ourselves. Wow! I found some great things and just couldn’t decide what to get or what I wanted to make. After much debate, I decided on the sample pack of Mod Podge so that I can try it all and I got a package of podgeables.

I am changing things up in the house and have decided to go with a beach theme. So after visiting Michaels, I though it would be the perfect time to get started.

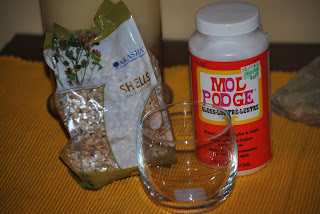
I made two candle holders with twine, shells and Mod Podge.
 
The first candle holder I wrapped with twine, keeping it in place with Mod Podge. I added some sparkle to a plain starfish with the new sparkle Mod Podge. Then, I placed the starfish on the twine.


On the second candle holder, I used Mod Podge, sea shells, and crushed sea shells.

I covered the bottom half of the candle holder with mod podge and crushed shells. I did this twice to get the amount of shells I wanted because with one coat it looked a little bare. Then I added a few shells.

 
I love how they both turned out! What do you think?


Linking to:


Lil\'Luna


Sunday, June 24, 2012

Jewelry Holder


Wow! Summer is here. It is really hot today, the outdoor thermometer says 102. So I am staying in getting laundry done and working on some craft projects. How are you staying cool?

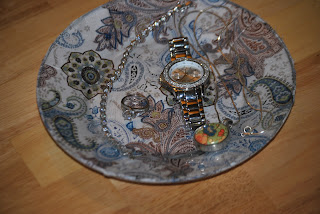
Today I am sharing another Mod Podge project I made last weekend. I made a catch all plate to hold my jewelry.
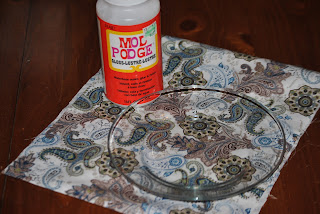
All it took was a clear glass plate from the dollar store, some fabric, and Mod Podge. I cut the fabric to fit the plate and then attached the fabric to the bottom of the plate with Mod Podge. It was so simple. 

Now when I take off my ring it won't just be laying on the counter and when I go looking for my necklace I will know right where it is. This would also make a great catch all plate for my husband pocket stuff. 

Enjoy the rest of the weekend!


Friday, June 22, 2012

Covered Baby Wipe Case

Let's get this weekend started! Like I said in an earlier post last weekend was all about Mod Podge. Since I had it out I made lots of projects.

This little case didn't need much fabric so I used fabric I had left over from the photo album I covered. Cutting the fabric to fit the case was a challenge since there are lots of curves and the top was more difficult with the opening. Some how I managed and got it cut out. Then using Mod Podge I placed the fabric on the case. Since the wipes are wet, I placed a layer of Mod Podge on top of the fabric to seal it.


Even with a few flaws I think it turned out pretty cute.

Do you plan on crafting this weekend?

Wednesday, June 20, 2012

Handmade Gift Exhange: What I Made

Hi friends! I participated in the Summer 2012 Handmade Gift Exchange over at Craftaholics Anonymous. After registering for the gift exchange I was given the name of another crafter. I was then able to see what her likes are and I could even ask her questions to find out more. After looking at the things she liked I knew right away what I wanted to make. However, if it seems to easy it usually is and I could not find what I wanted.

Then I found a charm of a paper airplane that she liked. I was thrilled! It has been a long time since I have made any jewelry so I was a little nervous. Then, once I got started on the bracelet, I was so excited  I forgot to get any pictures of the supplies I used. Oh well, the outcome of the bracelet is more important.


I look forward to hearing from my new friend when she gets the gift and getting to know her better.

Check out the Craftaholics Anonymous linky party to see all the gifts that were sent and received. If you get the chance, I would encourage everyone to participate in the next handmade gift exchange that will start November 1, 2012. 


Not A Plain Photo Album

I am going to be a grandma! In July, my husband and I are expecting our first grand-child. I am so thrilled and can barley contain my excitement. I found a very plain Jane photo album on the clearance aisle at Wal-Mart. I knew that I could make this a special album for the grand-baby. All it took was fabric and Mod Podge.


I cut the fabric the size of the album plus a ½ inch around all sides. Working in small sections, I put Mod Podge on the album and placed the fabric. Once the album was covered I wrapped the edges. Then I cut the photo opening in the front of the album and wrapped those edges.


I am ready to fill this album with pictures of our little bundle of joy.


Tuesday, June 19, 2012

Phone Case Makeover

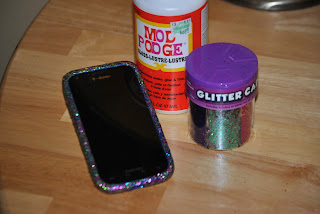
Happy Tuesday! One more day closer to the weekend so I can get to crafting. Like I said yesterday I have lots of projects from this weekend to share. Since the Mod Podge was out, my daughter decided to give her phone case a makeover. I didn't get a picture of it before the make over but it was just a plain blue case.

Just a few supplies: Mod Podge, glitter and a phone case. She mixed up the different colors of glitter and then added Mod Podge to the case. Then she added glitter onto the case until she had the case covered.  Once the Mod Podge was dry she coated the glitter with a thick layer of Mod Podge and let it dry overnight.


I think it looks really good. I love the glitter. She has been using it for several days now and the glitter is staying in place.

What would you glitter?

Monday, June 18, 2012

Color Change

Hello friends, hope all had a great father's day weekend with their families. We sure enjoyed our weekend and even though I enjoyed time with my husband and daughters, I had plenty of time to craft.

On Friday I found several things at Wal-Mart to use and refresh with some Mod Podge. I am so excited to share with you this week all the Mod Podge projects I worked on this weekend.

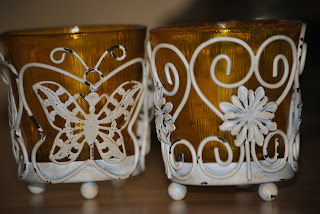
First, I worked on some votive candle holders that I already had. The holders look good the way they are but I am always looking to add color to items in my house. These votive holders where no exception they are white so I wanted to add a touch of color.

Instead of painting the holders I wanted to change the color of the glass. I took Mod Podge and added food coloring. I then painted the mixture onto the outside of the glass. Once dry, the yellow food coloring turned the glass into a gold color.

I think the splash of color really helps the butterflies and flowers stand out. And the glow from the candles look really nice. Since I'm not sure about how much heat the Mod Podge can withstand, I use the battery operated candles.

Where would you use this Mod Podge technique?


Wednesday, June 6, 2012

Silver Display

Happy Wednesday! I hope your week has been going great. It is really going fast for me. But I'm always looking forward to the weekend so I can get to crafting. I made this silver display this last weekend.

Recently, I found a post at Joys of Home of different silverware projects Joy has made. One project was of a silver tray with silver flatware, it just stood out and I could hear it calling to me. I have some silver trays and some silver flatware that was given to me. I have never used them in all the years I have had them. I love the idea of showing them off! Otherwise they would still be tucked into the back of the kitchen drawer where no one would ever see them.

I used a round tray and an oval server. To attach the scrapbook paper, I used Mod Podge. I tied the flatware with ribbon and then attached the flatware with hot glue to the trays.


 I am so thrilled to have found a way to display this silver in my kitchen.

Do you have a special way to display your silver?


Linking to:


Monday, June 4, 2012

Strawberry Pasta Salad

At work, we have a great tradition. Each month we have one day where we all bring food to celebrate the birthdays for that month. We have so many good cooks and there are always new recipes to exchange. The month of May was no exception and there was one dish that was a real surprise, strawberry pasta salad. This dish is cool and refreshing on a hot summer day.


Just a few ingredients:

A box of shell pasta, a carton of strawberries, one cucumber, and poppy seed dressing.

Boil the pasta, drain and cool.
In the meantime:

Chop the cucumber into small pieces.
Cut the strawberries into small pieces.
After the pasta is cool combine all ingredients and mix with the poppy seed dressing. I found several kinds of poppy seed dressing at the store however, I choose the dressing that was white. I think the white looks prettier with the strawberries.

 
This would be a great addition to a Fourth of July party with the white and red.

Do you have pot luck meals at work?


Linking up to:

Lil\'Luna